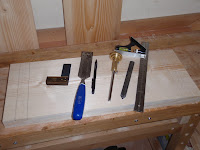
back to work on the kid table

?Now that the Hall Tree is done I could start working on the kids table again.  I stained it on Saturday to match the Hall Tree since they will be in the same area.  The stain came out a little blotchy in some areas.  The directions on the stain say that it does not need any conditioner applied first and I had great results with all my tests on the Hall Tree.  I bought the wood for the hall tree at Home Depot and the wood for the table was purchased at Lowes.  I also sanded the table a couple of weeks ago.  Im thinking that I should have re-sanded it the same day to open the pores a little more.  I also should have found some scraps from the Lowes wood to test the stain on.  I put one coat of poly on the bottom on the tabletop, let it dry for an hour, and then flipped it over and put a coat on the top.  I am going to give it a light sanding tonight and then apply another coat on both sides.  My goal is to have 2 coats on the bottom of the tabletop and the legs and frame and then 5 coats on the tabletop itself. 
On a side note its still pretty neat to see the color pop when you add the poly.
Read More..

Shaker Stool

As I havent built a stool for a while, I decided to try my hand at a Shaker style bench / stool. 
My scaffold boards have warped a fair bit in drying meaning a full bench was not really practical. Ok, I admit it, with a lot of planing it could be done, but my natural laziness told me to keep it small... hence Im calling it a Shaker stool.
With some inspiration from Google images I rough cut my two side pieces of timber and attacked them with my winding sticks, a no#6 Foreplane set for a heavy cut followed by my no#7 Try plane set fine to get them flat.
After getting the edges straight and parallel, I cut the ends square on the bench hook. 
I am definitely getting faster as milling rough sawn boards into usable stock.
The main feature of this stool is the cut out design of the side pieces. I first found the centre of the board and marked the position of my desired hole. 
Now its confession time... I didnt have an auger bit large enough and resorted to using .... A POWER TOOL!!!!! 
Yep, I drilled my hole with my cordless drill and I feel dirty for it!...In fact it made everything dirty - what a mess it made. To make matters worse there was also a lot of tear out between the hard and soft wood in the grain.
Finally cutting out the connecting wedge shaped bit of wood with my large tenon saw. Now I had my sides, I needed a seat piece, more milling... 
Soon it was beginning to look a bit like a stool...
Now I didnt have a plan and was just making it up as I went along, I had a loose idea of maybe some tenons in the side pieces coming up through the seat, but I didnt like the fact that the sides were the same width as the seat so there was no decorative overlap. 
I didnt want to reduce the width of the side pieces as that would make the stool less stable. Where the side pieces meet the top piece looks clunky. What to do.... I decided I would have the side pieces rabbeted into the seat for strength and see what it looks like  ... 
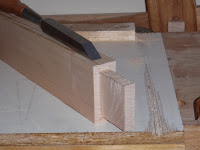
Hmn... Still rather clunky. My only other option is to have the tenons come up through the seat on the outside, thus hiding the joint. I marked and chiseled out the recesses in the seat top and used it as a template to mark up the side piece tenons. 
I was finally happy with how the joint looked, now I just needed a cross brace that would mortise and tenon through the side pieces. More milling...
With the brace all milled flat and true, I proceeded to cut the tenon on each end. Followed by the corresponding mortise in each side piece. 
I was aware (after I finished the tenons) that I should have cut the mortises first to ensure that the tenons would be a tight fit ... luckily they werent too bad.
It all fits... Now its my favourite part of the project... NOT!
Glue Up... Take the phone off the hook, lock the door. Get everything ready... do a dry run first.
I also added a chamfer to the ends of the seat top.
After gluing up the stool, it was just a matter of flush cutting off the protruding tenons, some final trimming and then applying a finish.
Read More..

Back to Sea

Just a quick Blog update ... Not much wood working action recently as indicated by the lack of posts.
I am busy preparing to deliver a nice little J92 racing yacht from the UK across Biscay and through the Gibraltar straits to the south coast of Spain. 
I will be gone for a few weeks but there will definitely be more projects when I get back.
See you all soon...
Read More..

The Woodworking Shows Are Back!

This year the Woodworking Shows are under new ownership with renewed energy, enthusiasm and excitement.
Every year the Woodworking Shows visit my neck of the woods when they stop in Somerset, NJ. Ive attended almost every show there for the last decade. In that time the quality of the show has moved decidedly downhill, the number and quality of the vendors has shrunken and it has gone from a full day to a few hour affair.
2 years ago, Andy and I were able to hang out and talk chair making.
There was a highlight two (2) years ago when Andy Chidwick traveled with the show, giving lectures and generally spreading woodworking enthusiasm. Even then the atmosphere was less than exciting though.
This year, under their new management, the Woodworking Shows have rebounded and are well on the choice to their former glory. Andy is back teaching about design and his wonderful sculpted woodworking. Jim Heavey, Paul Sellers, Roland Johnson, The Crazy Canadian and others are packing the lecture spaces also. Woodworkers are excited to attend and partake.
Where else can you see a cool bench like this, other than the Woodworking Shows.
There seemed to also be more vendors this year, and the vendors seem to be of higher quality. Companies like Woodpeckers, Arbortech and Clear Vue Cyclones were worth attendance alone.
The sense that I, and that the other attendees I spoke with, had is that the shows are back. The energy, enthusiasm and excitement are returning. The fun day of woodworking education, tool test drives and comradery is here again.
If you see this trailer, go in and check it out.
If the Woodworking Shows can maintain this return to form, next year will be a must attend. Check their calendar and see when theyll be near you. Itll be a worthwhile day.
Read More..

4th coat of poly and dull spots

I lightly sanded the tabletop last night and applied the 4th coat of poly. When I checked it this morning there were a couple of dull spots. It looks like I didnt quite get enough poly on them. It felt really smooth so I think I am going to apply the final coat without sanding first.
This was taken right after I put the poly on and it is still wet.
The 2 lighter spots next to the light reflection is where it looked dull this morning.  I am going to rotate the piece 180 degree and apply the final coat tonight.
Read More..

Shop Tour Mike Pekovich Part III

With the description of Mike Pekovichs Shop done, we now bring the tour, hosted by the man himself.
If you missed Parts I & II of the Mike Pekovich Shop Tour series, you can find them here.
Read More..

Blog Archive

Diberdayakan oleh Blogger.