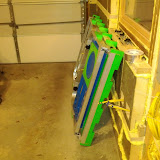
I put the new Craftsman router table together yesterday and it was much, much easier than the Ryobi. Each leg is held on by 4 bolts. The vertical ones just screw in and have washers and lock washers. The horizontal ones have lock washers, washers, and nuts. I found a diagram in the manual for installing the model of my router and it screwed right in with 3 bolts and the height adjustment hole lined right up. I installed the fence and featherboards in a couple of minutes and the table is now ready for testing.
routers and this one was on the list.

 I cant remember what this is called but it is used for routing end grain and smaller pieces. This one is made out of metal whereas the Ryobi one was made out of plastic.


 Read More..


Because the outlets are all color coded, I can now easily avoid over using the same outlet. I simply plug the second tool into a different colored outlet.
Ive not yet been able to build a full project with the new electric, though I have milled up a piece of 8/4 oak with no blown fuses. Running off my old, single 15A outlet, this would have been an exercise in frustration.
Read More..


 A few of the planks were quite wet as its been stored outside in a wood yard and obviously been recently rained on so I will let it dry out for a while before attempting to use it. Its a lot of wood as my aching back can testify....Watch this space!...
Read More..
Read More..
Read More..
With all the shaping finally done for the Quilt Rack, it was time to sand. I used a combination of random orbit sanders and 3M Sandblaster sanding pads. I like the sanding pads because the foam backing keeps the pad rounded and prevents gouging or flattening the curves of the work piece. The sanding began with 80 grit and progressed to 180.
After sanding, I began experimenting with finishes. I took a scrap of Flame Yellow Birch which I had milled and sanded along with the quilt rack pieces. I ran blue tape down the middle and applied boiled linseed oil to one half and General Finishes Merlot Dye Stain to the other.
It was somewhere around this point that I was corrected regarding the due date. It turned out I only had one week until my mother-in-law’s birthday party, not two. I immediately abandoned my finish samples and got back to the business of assembling the quilt rack.
I assembled the rack on my table saw so that I could rest in on a flat surface and ensure that it was square and wouldn’t rock. First I glued the cross members to one leg/foot assembly, then the other. As I was trying to push the second leg/foot assembly on, one of the Dominos gave me a hard time and wouldn’t slide into the cross member enough. Mid glue-up I pulled out a small pull saw and cut then end off the Domino. The leg/foot then fit on properly and I had an assembled quilt rack.
I clamped the rack with one parallel clamp for each cross member. I had a few extra clamps ready to run diagonally across the quilt rack to counteract and racking, but all four foot points sat perfectly on the table saw with no racking present at all.
With the assembly done, I next moved on to finishing the quilt rack.
Read More..


I couldnt get the Ryobi router to fit in the new table so I returned it and bought this Craftsman router
on sale for $50.99. I checked the router table manual before I went shopping for compatiblerouters and this one was on the list.
Here is the fully assembled table. It went together much faster then the Ryobi table.
I cant remember what this is called but it is used for routing end grain and smaller pieces. This one is made out of metal whereas the Ryobi one was made out of plastic.It came with 5 insert plates. The Ryobi also came with 5 but they all had holes. Im not sure what the solid one would be good for.
The included wrench has a wider handle built into the bottom which makes it a little more comfortable to use.
The router has a small push button to hold the shaft while you tighten or loosen the router bit. There is a small plastic shield behind it that you have to remove to reach the button.
The table has a hole in the top for adjusting the height of the router. I am using an allen wrench for now but would like to buy a t-handle wrench for it. Sears had a t-handle kit for $39.95 but I dont want to spend that much money. I just want to get the one to fit the router.
This is the allen wrench coming through the table top and into the router.
The plastic handles on the sides are a nice touch. They make the table comfortable to pick up.
?

Do not glue while tired
I learned a new lesson. Do not glue wood while tired. I figured that I would get a step up on the hall tree build and glue some boards together tonight. I wasnt thinking and didnt clamp the wood down to the bench before I drilled in the pocket holes and the wood drifted. I hate it when that happens. The good news is that the boards I glued together go behind the cubbys and nobody will ever really see them. Im hoping that I can just sand the hell out of them and even them up. Once again, this is the main reason I am using cheap wood. So I can make mistakes like this.

 Read More..
?
back to work on the kid table
?Now that the Hall Tree is done I could start working on the kids table again. I stained it on Saturday to match the Hall Tree since they will be in the same area. The stain came out a little blotchy in some areas. The directions on the stain say that it does not need any conditioner applied first and I had great results with all my tests on the Hall Tree. I bought the wood for the hall tree at Home Depot and the wood for the table was purchased at Lowes. I also sanded the table a couple of weeks ago. Im thinking that I should have re-sanded it the same day to open the pores a little more. I also should have found some scraps from the Lowes wood to test the stain on. I put one coat of poly on the bottom on the tabletop, let it dry for an hour, and then flipped it over and put a coat on the top. I am going to give it a light sanding tonight and then apply another coat on both sides. My goal is to have 2 coats on the bottom of the tabletop and the legs and frame and then 5 coats on the tabletop itself.
On a side note its still pretty neat to see the color pop when you add the poly.


Color Code Your Outlets To Eliminate Fuse Blowing Frustrations
For years Ive dealt with the frustration of running every power tool (& the lights) in my shop off of a single 15A outlet on a circuit shared with the hall in the house. This has meant that I faced constant mid-cut circuit popping. Because I do most work in the shop at night, Ive also had to learn to find my circuit breaker by feel when the lights go out.
 |
| My sorry old original 15A outlet. |
Thankfully the new 110V electric for the shop has just been finished. There are now three (3) 20A circuits dedicated to the shop alone. This has meant fewer extension cords, much less unplugging & re-plugging, the ability to use multiple tools at once (table saw, shop vac, air filter & lights!) and most importantly - no blown fuses. I chose to install 20A circuits in the garage so that it would be near impossible to blow a fuse with a single tool. However, running multiple tools (such as my planer & dust collector) simultaneously on the same circuit could still exceed 20A. In order to avoid this, I used a two (2) step process.
First, I wired the shop so that the three (3) circuits were each equally distributed around the shop (or at least the wall I wired so far). While its not quite an A, B, C, A, B, C, A, B, C . . . pattern, it is close. From anywere on the wall at least two (and often all 3) circuits are easily reachable. |
| Outlets. So many outlets. |
The second thing I did to avoid overloading any single circuit was to color code the outlet covers. I left one (1) circuit white and used the Rust-Oleum spray paint for plastic to paint the outlet cover plates for the second circuit blue and for the third, green. I dont expect the paint to look pristine for long, but as long as theres some trace of color, I should be OK. I had initially intended to buy outlets in multiple colors, but buying so many 20A outlets in non-standard colors proved prohibitively expensive. I think Ive managed to achieve the same effect for much less with spray paint.
 |
| White, Green & Blue. One color per circuit. |
 |
| Its now super easy to tell which circuit Im plugged into. |
Timber!!!
My first post of 2012 and Im already breaking my Work with more hard woods New Years Resolution. OK - Im not breaking it literally but it seems very likely given whats posted below...
We (the girlfriend and I) have been discussing having some raised beds in the garden to grow vegetables for some time and with wood being expensive - a lot more expensive than vegetables anychoice, the whole project seemed like a waste of time and a false budget. Until I found an advert on Ebay selling 13ft long x 225mm wide x 36mm thick scaffold boards at £200 for 25 boards. That works at just over £2 per meter! According to the dealer its Scandinavian Redwood - to me its Pine!The wood I used for my large coffee table top (also Pine) of almost exactly the same dimensions cost around £12 per meter!So, the plan is to build some things to sell and thus (hopefully) get the wood for the raised garden vegetable beds for essentially free. I might even make some money in the process! - At least this is in the right direction for my other resolution - Sell some of the things I make.Anychoice - The work began when the flat bed truck arrived and unloaded the boards on the drivechoice. Somehow the stack of wood looked a lot bigger than what I was imagining! Nevermind using hand tools, out came an old jigsaw! I saved about 7 out of the 25 boards that some showed signs of cracking to be used in the garden at full length.
Leaving me with this pile (below) of 6 1/2ft long boards, that now had to be carried to the garden shed to keep it dry. And you think you have timber storage issues!!!
Table Saw Blade Selection
I went to Lowes yesterday to pick up a small detail sander with a gift card from my wife. While I was there I took a look at their table saw blades. I didnt buy one because I wanted to do some research on what the different tooth counts were good for. I checked my YouTube subscriptions this morning and lo and behold, there is a video from the WWGOA on just that topic. I need to start thinking about how to win the lottery next....
Download the MP3
Date: May 30, 2013
By: Chris Adkins, Dyami Plotke, Tom Iovino
Description: Join us for this episode as we speak with guest Michael Pekovich of Fine Woodworking magazine. For show note and more on the MWA visit: http://modernwoodworkersassociation.com
Show Notes:
What’s in the shop?
- Chris
- chisel cabinet
- humidor
- Dyami
- Priming the Tree House
- Mike
- Using props from photo shoots as a reason to build cabinets
Newsletter to come
Main topic
- Tonight’s guest, the 2010 Tenon Shootout Champion
- Mike Pekovich, Fine Woodworking’s Art Director
- Mike’s classes at Fine Woodworking Live
- MIke’s Hobbit Cupboard
- Mike’s Turn Your Garage Into A Real Workshop article
More on Mike’s shop
- Fine Woodworking Best Workshops
- Penultimatewoodshop.com Series on Mike’s Shop
If you’re missing us already, you can subscribe to the show on itunes. Just search for the Modern Woodworkers Association. Once you’re subscribed, you’ll be sure never to miss an exciting episode. While you’re in iTunes, please leave us a 5 star rating. It helps our rank so others can more easily find us.
If you want to find out more about the Modern Woodworkers Association, be sure to visit modernwoodworkersassociation.com, follow the MWA on twitter @MWA_National, like the MWA on Facebook or circle Modern Woodworkers Association on Google+. While you’re there, join the MWA Google+ community for project sharing, discussion and loads of woodworking banter.
The Guild Top Table
The Wood Whisperer Guild is about to embark on their next group build -- the Tilt Top Table.
 |
| Safety first . . . and second . . . and third . . . |
What is the Wood Whisperer Guild you ask? Surely you know already if you’re an active part of the online woodworking community. If you’re new, the Guild is the members section of the Wood Whisperer Site. Why be a member? There are many great reasons. If you’re not yet familiar with them, you can watch an exhausted and dreary eyed me talk about why the Guild is so great.
This build will be a neat project. It’s going to be a traditional tilt top table. While this traditional form of furniture isn’t quite to my taste, it is much to my wife’s. I’m sure that if it’s not quite your style either, someone you know will still love it.Regardless of style, it’s going to be an interesting build. It’ll be the first time a Guild Build breaks out the lathe. The flip top and gently splaying legs that extend the shape of the center turning will also be fun to build. Or you could bastardize the design and not turn or splay it, as I’d probably do.
That is the great thing about Guild Builds. Though it’s a community build of many Guild members building along with Marc, the project’s not as important as the community. I’ve never had as much fun building a project as I have with the Guild Builds I’ve participated in. Even when my own project veered off dramatically from the one Marc was building, it was still great to participate with the group and share the camaraderie that only comes from building along with a group. Short of sharing a classroom, the Wood Whisperer Guild is the best choice to enjoy you woodworking (and learn) with others.
Learn more about the table with Marcs introduction video.
Racking The Quilts Part IV
With all the shaping finally done for the Quilt Rack, it was time to sand. I used a combination of random orbit sanders and 3M Sandblaster sanding pads. I like the sanding pads because the foam backing keeps the pad rounded and prevents gouging or flattening the curves of the work piece. The sanding began with 80 grit and progressed to 180.
 |
| My finish sample board. |
It was somewhere around this point that I was corrected regarding the due date. It turned out I only had one week until my mother-in-law’s birthday party, not two. I immediately abandoned my finish samples and got back to the business of assembling the quilt rack.
 |
| The cross members assembled to one leg. |
 |
| By sheer dumb luck, I was able to assemble the quilt rack square on the first try with no tweaking. |
With the assembly done, I next moved on to finishing the quilt rack.
Hook Board
Another super quick & dirty project...
A fast approaching birthday and the question of where to hang dog leads and keys in the pantry.
Both problems solved ...
 A scrap of Pine, some dowel and some spare brass hooks I had kicking around....
I squared, chamfered edges and smoothed with my No#4 Plane.Used a bradawl for the threaded brass hooks. Drilled the holes and glued in the dowel. A lick of boiled Linseed oil. Done!
Its Rustic....
Read More..
A fast approaching birthday and the question of where to hang dog leads and keys in the pantry.
Both problems solved ...
I squared, chamfered edges and smoothed with my No#4 Plane.Used a bradawl for the threaded brass hooks. Drilled the holes and glued in the dowel. A lick of boiled Linseed oil. Done!
Its Rustic....
Another new project a Hall Tree!
My 2 year old son has learned the joys of opening the front door as wide as he can when he gets home. In the course of this learning experience he has demolished the cheap coat rack that I bought at Wal Mart about 10 years ago. It has been on a steady decline for the last year and he finally just finished it off.
As a consequence of this my wife challenged me to make a coat rack in 2 weeks to replace it. She invisioned a board with some dowels sticking out of it screwed to the wall. Where is the challenge in that? I did some looking around at some other projects on www.Lumberjocks.com and decided to make a Hall Tree. It is going to be 5 high by 2 wide and 9" deep. It will have a shelf on top with a 2"back and a 5" stretcher underneath for hooks to attach to. The seat will be about 13" high with 2 shelves divided into 5 cubbys for shoe storage. I also plan on putting hooks on the sides. 1 at the top of each side and 1 down lower for backpack storage.
I went to Home Depot and bought 3 - 1x10x6 and 3 - 1x6x10 common boards. I think they are knotty pine. I also bought a $5 bottle of wood glue and a $.61 dowel for my son and the total came out to $44.40. Initially I was thinking that I would make it out of all 1x6s but with the 2 week deadline I opted for the more expensive 1x10s.
The 1x10s were 9.25" wide which messed me up a little because I was expecting them to be 9.5". I ripped them to 9" wide and 5 long. I ripped the 1x6s down to 5" and then used the miter saw to cut them down to 22.5" wide. I also cut one of the 1x10s into 3 - 9x22.5 boards for the seat and cubbys.
I opted to just cut an angle for the sides to slope up. My jigsaw is not working very well right now and I am not that good with it when it is working correctly so the 2 equal really crappy cuts.
I will be attaching everything using pocket holes, glue, and my nail gun.
The seat and cubbys will also have some extra supports glued and tacked underneath just to play it safe.
Cubby dividers same length as supports and 5" tall. These will be glued and tacked into place.